set up sales
Before you can manage sales processes, you must configure the rules and values that define the company's sales policies.
You must define the general setup on the Sales & Receivables page, such as which sales documents are required, how their values are posted, and the type of lines to create by default. This general setup is typically performed once during the initial implementation.
A separate series of tasks related to registering new customers is to record any special price or discount agreements that you have with each customer. For more information, see Record Special Sales Prices and Discounts.
Finance-related sales setup, such as payment methods and currencies, are covered in the Finance Setup section. For more information, see Setting Up Finance.
| To | See |
|---|---|
| Create a customer card for each customer that you sell to. | Register New Customers |
| Enable customers to pay through PayPal by choosing the PayPal logo on sales documents. | Enable Customer Payment Through PayPal |
| Enter the different discounts and special prices that you grant to customers depending on item, quantities, and/or date. | Record Sales Price, Discount, and Payment Agreements |
| Set up salespeople so that you can assign them to customer contacts or measure salespeople's performance as a basis for calculating the sales commission or bonus. | Set Up Salespeople |
| Specify for individual customers or for all customers how sales documents are sent by default when you choose the Post and Send action. | Set Up Document Sending Profiles |
| Set your email up to contain a summary of information in the sales document that is being sent. | Send Documents by Email |
| Use an EU web service to verify a customer's VAT registration number. | Verify VAT Registration Numbers |
| Define the different incoterms that you offer to customers or that your vendors offer you. | Set Up Shipment Methods |
| Enter information about the different transportation vendors you use, including a link to their package tracking service. | Set Up Shipping Agents |
| Specify default reports to be used for different document types. | Report Selection in Business Central |
| Specify whether users are allowed to post sales invoices, and whether they must post them together with a shipment. | Define an invoice posting policy for users |
register new customers
Customers are your source of income. You must register each customer you sell to as a customer card. Customer cards contain the information required to sell products to the customer. To learn more, go to Invoice Sales and Register New Items.
Before you can register new customers, you must set up various sales codes to choose from when you fill in customer cards. To learn more, go to Setting Up Sales.
Add new customers
You can add new customers manually by filling out the Customer Card page, or you can use templates that contain predefined information. For example, you can create a template for different types of customer profiles. Using templates saves time when adding new customers, and helps ensure the information is correct each time.
If you create:
Multiple templates for use with more than one type of customer, you can choose the suitable template when you add a customer.Only one template is used for all new customers.
After you create a template, you can use the Apply Template action to apply it to one or more selected customers. To create a template, fill in the information to be reused on the Customer Card page, then save it as a template. To learn more, go to To save the customer card as a template.
Tip
It can be helpful to personalize the Customer Template page when you create a template. For example, you might want to add the Credit Limit field to a template. To learn more, go to Personalize your workspace.
You can also create a customer from a contact. To learn more, go to Create a customer, vendor, employee, or bank account from a contact.
To create a new customer card
Choose the

icon, enter Customers, and then choose the related link.
On the Customers page, choose the New action.
If only one customer template exists, then a new customer card opens with some fields filled with information from the template.
If more than one customer template exists, then a page opens from which you can select a customer template. In that case, follow the next two steps.
On the Select a template for a new customer page, choose the template that you want to use for the new customer card.
Choose the OK button. A new customer card opens with some fields filled with information from the template.
Proceed to fill or change fields on the customer card as necessary. Hover over a field to read a short description.
The Prices & Discounts action provides options for managing special prices or discounts for a customer when an order meets certain criteria. When purchasing a certain item, ordering a minimum quantity, or buying before a date, such as when a campaign ends, are examples of such criteria. To learn more, go to Record Sales Price, Discount, and Payment Agreements.
The customer is now registered, and the customer card is ready to be used on sales documents.
To save the customer card as a template
You can use a customer card as a template when you create new customer cards.
On the Customer Card page, choose the Save as Template action. The Customer Template page opens showing the customer card as a template.Fill in the fields as necessary. Hover over a field to read a short description.To reuse dimensions in templates, choose the Dimensions action. The Dimension Templates page opens showing any dimension codes set up for the customer.Edit or enter dimension codes you want to apply to new customer cards created with this template.When you complete the new customer template, choose OK.
The customer template is added to the list of customer templates, and you can use it to create new customer cards.
Delete customer cards
If you post a transaction for a customer, you can't delete the customer card because the ledger entries might be needed for auditing. To delete customer cards with ledger entries, contact your Microsoft partner to do so through code.
Manage credit limits
Credit limits, balance amounts, and payment terms make it possible for Business Central to issue a credit and an overdue balance warning when you enter a sales order. Furthermore, reminder term and finance charge term elements enable you to invoice interest and/or extra fees.
The Credit Limit field on a customer card specifies the maximum amount you allow the customer to exceed the payment balance before warnings are issued. When you enter information in journals, quotes, orders, and invoices, Business Central tests the header and lines to determine whether the document exceeds the credit limit.
You can post even if the credit limit exceeds. A blank field means there's no credit limit for this customer.
You can choose not to receive warnings when the customer's credit limit is exceeded, and you can specify which types of warnings you want to see.
To specify credit limit warnings
Select Search (Alt+Q)

in the upper-right corner, enter Sales & Receivables Setup, then choose the related link.
On the General FastTab, in the Credit Warnings field, choose the relevant option as described in the following table:
| Option | Description |
|---|---|
| Both Warnings | Both the Credit Limit and the Balance Due fields on the customer's card are checked, and a warning is shown if the customer exceeds its credit limit or has an overdue balance. |
| Credit Limit | The value in the Credit Limit field on the customer's card is compared with the customer's balance, and a warning is shown if the customer's balance exceeds this amount. |
| Overdue Balance | The Balance Due field on the customer's card is checked, and a warning is shown if the customer has an overdue balance. |
| No Warning | No credit warnings are shown regarding the customer's status. |
Assign a salesperson
You can assign salespeople to customer ship-to address rather than their billing address so your sales reports reflect the true geographical distribution of your sales. Assigning a salesperson to a customer's ship-to address gives you more precise insights and optimizes resource allocation.
Assign a salesperson on the Customer card page by choosing Customer, and then Ship-To Addresses to open the Ship-to Addresses List page. Choose Manage, and then Edit to open the Ship-to Address card page. Enter or choose a Salesperson Code to select the salesperson.
When you choose the Alternate Shipping Address option as a Ship-To location on a sales document, the Salesperson Code updates to match the salesperson from the Ship-to rather than the Bill-to address.
enable customer payments through payment services
As an alternative to collecting payments through bank transfer or credit cards, your customers can pay you through their account with payment services, such as PayPal or WorldPay.
After you enable a payment service in Business Central, a link to the service is available on sales documents that you send by email to your customers. Customers can use the link to go to the payment service and pay the bill, directly from the sales document. If you don't want to include the link, for example, if a customer will pay with cash, you can remove the payment service from the invoice before posting.
The PayPal Payments Standard and WorldPay Payments Standard extensions are installed in Business Central, and are ready for you to enable.
Caution
The WorldPay Payments Standard extension will be deprecated. The code is market as obsolete starting in 2023 release wave 2. The app will be active for the next three major releases and then it will be removed.
To enable a payment service in Business Central
Select Search (Alt+Q)
in the upper-right corner, enter Payment Services, and then choose the related link.On the Payment Services page, choose the New action.Select the payment service, and then close the page.On the Payment Services page, choose the Setup action.Fill in the fields as necessary. Hover over a field to read a short description.Close the page.
To select a payment service on a sales invoice
Select Search (Alt+Q)
in the upper-right corner, enter Sales Invoices, and then choose the related link.
Open the sales invoice that you want to pay by using the payment service.
In the Payment Service field, choose the payment service.
Note
The Payment Service field is available only if you've enabled the payment service.
set up prices and discounts
Note
In 2020 release wave 2, we released streamlined processes for setting up and managing prices and discounts. If you're a new customer using that version, you're using the new experience. If you're an existing customer, whether you're using the new experience depends on whether your admin enabled the New sales pricing experience feature update on the Feature Management page. Learn more in Enable Upcoming Features Ahead of Time.
Price and discount strategies for the purchase and sale of items and services are fundamental tools for successful businesses. After you set up the items and services your company buys and sells, you can define what you pay or charge for them. When you select the item or service on sales and purchase documents, Business Central adds the amounts.
Set up prices and discounts
Before you create price lists, you must define your pricing and discount strategies on the Sales & Receivables Setup and Purchase & Payables Setup pages.
You can set up and use two types of discounts:
| Discount Type | Description |
|---|---|
| Line Discount | A discount amount that is given for lines on sales and purchase documents. Typically, line discounts are based on a combination of customer, item, minimum quantity, unit of measure, or period of time that you define for sales and purchases on the Sales & Receivables Setup and Purchase & Payables Setup pages. |
| Invoice Discount | A discount percentage that is subtracted from sales and purchase document total if the sum of all lines on the document exceeds a certain minimum. |
Because sales prices and sales line discounts are based on a combination of item and customer, you can also set them up on the items to which the rules and values apply.
Tip
If an item should never be sold with a discount, leave the discount fields on the item empty, and don't include the item in any line discount setups.
About price lists
Price lists are flexible and let you specify the business partner or activity that they apply to. For example, you can set up one price list that applies to all vendors and customers, or offer special prices or discounts for each business partner. Special prices or discounts are often based on a minimum quantity on purchase or sales orders, periods of time, or a certain combination of customer, item, minimum quantity, and unit of measure. The prices and discounts you define automatically apply to purchase and sales documents.
Set up prices
These steps differ, depending on whether your admin turned on the New sales pricing experience feature update.
Current ExperienceNew ExperienceCurrent ExperienceNew ExperienceCurrent ExperienceNew ExperienceCurrent ExperienceNew Experience
You can add items and services manually for each line, or you can use the Suggest Lines action to create new prices for selected items, item discount groups, resources, and other product types. If you choose Suggest Lines, on the Price Lines – Create New page you can use filters to select the items or services to include on the price list. You can also specify whether to consider other factors, such as:
A minimum quantity when calculating prices.The adjustment factor to apply for new price list lines.The rounding method to apply for prices.
Tip
The Edit in Excel action offers a fast way to add or update multiple lines. The action exports the price list information to Excel, where it's easy to edit. When you're done, publish your changes to update Business Central. The action is available on the Sales Price Lists page, and the Lines FastTab on the Sales Price List page. Choose

, and then choose Edit in Excel. To learn more about the action, go to Edit in Excel.
By default, the status of new price lists is Draft. When you're ready to start using the list, you can change the status to Active.
To review price lists and prices that apply for specific customers or vendors, on the Customer or Vendor pages, choose either Sales Price Lists or Purchase Price Lists action. For items and resources, you can view price list lines by choosing Sales Prices or Purchase Prices on the Item and Resource pages.
Select Search (Alt+Q)
in the upper-right corner, enter Customers, and then choose the related link.Choose the customer, and then choose the Sales Price Lists action.Choose New to create a new sales price list.On the General and Tax FastTabs, fill in the fields as necessary. Hover over a field to read a short description.Add items to the list in one of the following ways:
To add many items, choose Suggest Lines, and then enter filter criteria to specify the types of items to add. Optionally, you can enter settings for the items that are specific to the price list. You can change the settings later, if needed.To copy items from another price list, choose Copy Lines, and then choose the price list to copy.To add items manually, in the Product Type field, choose the type of product that the price list is for. Depending on your selection, fill in the remaining fields as necessary. Hover over a field to read a short description. To start using the price list, in the Status field, choose Active.
To set up a sales line discount for a customer
These steps differ, depending on whether your administrator turned on the New sales pricing experience feature update.
record special sales prices and discounts


Note
2020 release wave 2 introduced new, streamlined processes for setting up and managing prices and discounts. If you're a new customer using the latest version, you're using the new experience. If you're an existing customer, whether you're using the new experience depends on whether your administrator enabled the New sales pricing experience feature update in Feature Management. Learn more at Enabling Upcoming Features Ahead of Time in the administration content.
Business Central supports various pricing strategies, such as:
One-price-fits-all models where an item is always sold at the same price.
Special price agreements with specific customers, or groups of customers.
Campaigns when a sale meets the criteria for a special offer. For example, you might have the following criteria for an order:
It meets a minimum quantityIt's before a certain dateIt includes a certain type of item
To use a basic pricing model, you only need to specify a unit price when you set up an item or resource. That price is always used for the item on sales documents. For more advanced models, for example, when you want to offer special prices for a sales campaign, you can specify criteria on the Sales Prices page. You can offer special prices based on a combination of the following information:
CustomerItemUnit of measureMinimum quantityDates that define the period for which the prices are valid.
After you set up special prices, Business Central can calculate best prices on sales and purchase documents, and on lines on projects and item journals. Learn more at Best Price Calculation.
For sales discounts, you can set up two types:
| Discount Type | Description |
|---|---|
| Sales Line Discount | Add an amount on sales lines that have a specific combination of information. For example, customer, item, minimum quantity, unit of measure, or starting and ending date. This type works in the same way as for sales prices. |
| Invoice Discount | A discount percentage that is subtracted from the sales document total if the sum of all lines on the document exceeds a certain minimum. |
Tip
If an item should never be sold with a discount, leave the discount fields on the item page empty, and don't include the item in any line discount setups.
To set up a sales price for a customer
These steps differ, depending on whether your administrator turned on the New sales pricing experience feature update. If the feature update isn't turned on, follow the steps on the Current Experience tab.
Current experienceNew experience
By default, the status of new price lists is Draft. Draft price lists aren't included in price calculations. When you're done adding lines and want to start using the prices, change the status to Active.
Choose the
icon, enter Customers, and then choose the related link.Choose the customer, and then choose the Sales Price Lists action.Choose New to create a new sales price list.On the General and Tax FastTabs, fill in the fields as necessary. Hover over a field to read a short description.To add items to the list, do one of the following steps:
To add many items, choose Suggest Lines, and then enter filter criteria to specify the types of items to add. Optionally, you can enter other settings for the items that are specific to the price list. You can change these settings later if needed.To copy items from another price list, choose Copy Lines, and then choose the price list to copy.To add items manually, in the grid, in the Product Type field, choose the type of product that the price list is for. Depending on your selection, fill in the remaining fields as necessary. Hover over a field to read a short description. To start using the price list, in the Status field, choose Active.
Using sales and purchase price lists
Note
Using price lists requires that your administrator enabled the New sales pricing experience feature update in Feature Management. Learn more at Enabling Upcoming Features Ahead of Time in the administration content.
Most of the new sales pricing experience is similar to the current experience, but there are a few differences. Those differences are described in the following sections.
The Applies-to Type and Applies-to No. fields let you choose what a price list applies to, such as customer or customer price group. Using View Columns for, you can show or hide columns relevant for setting prices, discounts, or prices and discounts.
Converting existing prices when you turn on the pricing feature update
When you enable the New sales pricing experience feature update on the Feature Management page, the Feature Data Update guide opens. Use the Use default prices toggle as follows:
If you want to work with all prices on a single page, turn it on. Existing prices convert to one default price list for each of the following documents:
SalesPurchasesJob salesJob purchases
You can edit all prices for these areas on the Prices Worksheet page. You set the default price lists on the Sales & Receivables Setup, Purchases & Payables Setup, and Projects Setup pages.
Note
If prices are set only on item or resource cards, default price lists aren't updated with those prices during the data update. However, you can open any of the default price lists or the Price Worksheet page and use the Suggest Lines action to add the prices set on item or resource cards.
To use sales price lists, turn it off. Existing prices convert to a new price list for each combination of the following things:
CustomerCustomer group or campaignStarting and ending datesCurrencies
If you have many combinations, you get many price lists.
If you already enabled the New Pricing Experience, you can create default price lists manually or specify an existing price list as the default. To set an existing price list as default, turn on the Allow Updating Defaults toggle on the price list. Then, on the Sales & Receivables Setup, Purchase & Payables, or Projects Setup pages, set the price list as the default.
Editing active price lists
To allow people to edit prices on active price lists for items, resources, customers, vendors, or other entities that use pricing, turn on the Allow Editing Active Price toggle on the Sales & Receivables Setup and Purchase & Payables Setup pages.
When the Allow Editing Active Price toggle is turned off, to update prices in a price list you must change the status of the price list to Draft, make your change, and then reactivate the price list.
The Prices Overview page provides an overview of all prices across price lists. You can set filters to narrow down the list of prices you might want to modify or add to. After you modify prices, you must use the Verify Lines action to verify the prices against other price list lines. Verifying prices helps avoid duplicates and ambiguity during price calculation.
Note
When you edit a line in an active price list the status of the line becomes Draft, and the line isn't considered during price calculation until you use the Verify Lines action. After you verify the price, the status of the line becomes Active and it is considered in price calculations.
To add new prices, on the Prices Overview page, use the Add New Lines action. The Prices Worksheet page opens, and you can add price lines either by suggesting them based on criteria, copying them from other price lists, or manually entering them. Afterward, you can use the Implement Price Change action to compare the new prices with other price lists to avoid duplicates and ambiguity during price calculation.
Create sales price lines based on the unit price
On the Prices Worksheet page, choose the Suggest Lines action.On the Price Lines – Create new page, fill in the fields as necessary. Hover over a field to read a short description.On the Product filter field, define filters for the selected Product Type.Choose the Defaults field to specify settings such as:
Which entities the price list is assigned to.Dates when the price is valid.The currency code.The amount type filter that defines the columns shown on the price list lines. Choose OK. New lines are added to the Price Worksheet page with the selected settings and the unit prices from the item cards.Edit the created lines with the new unit prices or discounts. Hover over a field to read a short description.
Create sales price lines based on existing price lists
On the Prices Worksheet page, choose the Copy Lines action.On the Price Lines – Copy existing page, select an existing price list on the From Price List field.On the Price Line filter field, define filters for the products on the selected price list.Choose the Defaults field to specify settings such as:
Which entities the price list is assigned to.Dates when the price is valid.The currency code.The amount type filter that defines the columns shown on the price list lines. Fill in the other fields as necessary. Hover over a field to read a short description.Choose OK. New lines are added to the Price Worksheet page with the selected settings.Edit the created lines with the new unit prices or discounts. Hover over a field to read a short description.
To copy sales prices
These steps differ, depending on whether your administrator turned on the New sales pricing experience feature update. If the feature update isn't turned on, follow the steps on the Current Experience tab.
Current experienceNew experience
You can specify the settings that the price list uses:
Use the settings from the header on the list you're copying.Use the settings from the list you're copying to. To use the settings from the price list you're copying prices to, turn on the Use defaults from target toggle.
Choose the
icon, enter Sales Price Lists, and then choose the related link.
Choose the price list to copy, and then choose Copy Lines.
Fill in the fields as necessary. Hover over a field to read a short description.
Note
You can't have two items that have the same settings but different prices. If that happens, a message displays when you activate the price list. You can choose the price to use by opening the list and deleting the incorrect price.
Bulk update item prices
These steps differ, depending on whether your administrator turned on the New sales pricing experience feature update. If the feature update isn't turned on, follow the steps on the Current Experience tab.
Current experienceNew experience
To update prices for multiple items, you must create a new price list, and then copy the lines from an existing price list. When you copy the lines you can use filters to specify what to copy, and you can specify an integer or decimal number in the Adjustment Factor field to increase or decrease prices. The price list must be in the Draft status. If needed, you can then deactivate the old price list.
Note
You can't have two lines that have the same settings but different prices. If that happens, a message displays when you activate a price list. You can choose the price to use by opening the list and deleting the incorrect price.
Tip
Another way to do bulk changes is to use the Edit in Excel action. If you use Excel, there are some specific steps to follow. To learn more, go to Add or edit lines on price lists using Edit in Excel.
Best price calculation
After you record special prices and line discounts for sales and purchases, Business Central calculates the best price on the following documents and journals:
Sales and purchase documentsProject and item journal lines
The best price is the lowest price with the highest line discount allowed on a given date. Business Central calculates best prices when it adds unit prices and the line discount percentages on document and journal lines.
Note
The following steps describe how Business Central calculates the best price for sales. For purchases, the calculation is similar but is based on the available parameters. For example, item discount groups aren't supported for purchasing.
Business Central checks the combination of the bill-to customer and the item and then calculates the applicable unit price and line discount percentage, using the following criteria:
Does the customer have a price/discount agreement, or does the customer belong to a group that does?Is the item or the item discount group on the line included in any of these price/discount agreements?Is the date within the starting and ending date of the price/discount agreement? For invoices and credit memos, this date is the date in the Posting Date field on the document header. For all other documents, it's the date in the Order Date field on their headers.Is a unit of measure code specified? If so, Business Central checks for prices/discounts with the same unit of measure code, and prices/discounts with no unit of measure code.
Business Central checks whether any price/discount agreements apply to information on the document or journal line. It then inserts the applicable unit price and line discount percentage using the following criteria:
Is there a minimum quantity requirement in the price/discount agreement that is fulfilled?Is there a currency requirement in the price/discount agreement that is fulfilled? If so, the lowest price and the highest line discount for that currency are inserted, even if local currency would provide a better price. If there's no price/discount agreement for the specified currency code, Business Central inserts the lowest price and the highest line discount in your local currency.
If no special price can be calculated for the item on the line, then either the last direct cost or the unit price from the item card is inserted.
Sales invoice discounts and service charges
When you use invoice discounts, the total amount on the invoice determines the size of the discount that you grant. On the Cust. Invoice Discounts page, you can also add a service charge to invoices over a certain amount.
Before you can use invoice discounts with sales, you must specify certain information. You must make the following decisions:
Which customers get this type of discount?Which discount percentages do you use?
If you want invoice discounts to be calculated automatically, on the Sales & Receivables Setup page, turn on the Calc Inv. Discount toggle.
You can specify whether you grant invoice discounts when an invoice meets certain criteria for each customer. For example, when the invoice amount is large enough. Invoice discounts can be in local currency for domestic customers, or in foreign currency for foreign customers.
You link discount percentages to specific invoice amounts on the Cust. Invoice Discounts page for each customer. You can enter any number of percentages. Each customer can have their own page, or you can link several customers to the same page.
In addition to, or instead of, a discount percentage, you can link a service charge amount to a specific invoice amount.
Tip
Before you enter this information, it's a good idea to prepare an outline of the discount structure that you want to use. The structure makes it easier to determine which customers can be linked to the same invoice discount page. The fewer pages you have to set up, the faster you can enter the basic information.
To learn more about discounts in sales, go to Set up discounts for your customers.
Calculating invoice discounts on sales
After you've added all the items on lines you can calculate the invoice discount for the entire sales document by choosing the Calculate Invoice Discount action.
The discount is calculated based on all lines on the sales document where the Allow Invoice Disc. checkbox is chosen. By default, invoice discounts are allowed. However, lines with item charges, for example, are not included in the calculation of the invoice discount. To apply a discount to such lines, enter a value in the Line Discount Amount field on the lines.
Note
By default, the Allow Invoice Disc. and Line Discount Amount fields are hidden on lines. If the fields aren't available, you can add them by personalizing the page. For more information, see Personalize Your Workspace.
Tip
If the Calc. Inv. Discount field is selected in the Sales & Receivables Setup page, the invoice discount is calculated automatically. When the calculation happens differs, depending on the type of sales document you're using.
If you're using a sales order, the discount is calculated when you add a line. For all other sales documents, such as sales invoices, the discount is calculated when you do any of the following actions:
View statisticsView a test reportPrintPost
You define invoice discount terms for a customer on the Cust. Invoice Discounts page. The currency code on the sales document is used to find the invoice discount terms in the corresponding currency.
If you haven't defined invoice discounts for foreign currencies, the discount terms on the Cust. Invoice Discounts page are used to calculate the discount. The calculation uses your local currency and the exchange rate that was valid on the document's posting date.
To set up a sales line discount for a customer
These steps differ, depending on whether your administrator turned on the New sales pricing experience feature update. If the feature update isn't turned on, follow the steps on the Current Experience tab.
Current experienceNew experience
Choose the
icon, enter Customers, and then choose the related link.
Choose the customer, and then choose the Sales Price Lists action.
Open the price list for which to specify the line discount.
Create a new line, or choose an existing line, and then fill in the fields as necessary. Hover over a field to read a short description.
In the Defines field, choose either Price & Discount, or just Discount.
In the Line Discount % field, specify the discount percentage.
Tip
If you're editing an existing line, you can filter the lines by choosing the appropriate option in the View Columns for field.
Note
Invoice discount codes are represented by existing customer cards. This connection enables you to quickly assign invoice discount terms to customers by picking the name of another customer with the same terms. To set up customer-specific invoice discount terms, set the Invoice Disc. Code field to the customer's customer code, and then proceed to the next step.
To set up an invoice discount for a customer
After you decide which customers are eligible for invoice discounts, enter the invoice discount code on the Customer Card pages. Then set up the terms for each code.
Choose the
icon, enter Customers, and then choose the related link.Open the customer page for a customer that's eligible for invoice discounts.In the Invoice Disc. Code field, select a code for the relevant invoice discount terms to use to calculate invoice discounts for the customer.
Note
Invoice discount codes are represented by existing customer cards. This connection enables you to quickly assign invoice discount terms to customers by picking the name of another customer with the same terms.
Proceed to set up the new sales invoice discount terms.
On the Customers page, choose the Invoice Discounts action. The Cust. Invoice Discounts page opens.In the Currency Code field, enter the code for a currency that the invoice discount terms on the line apply to. Leave the field blank to set up invoice discount terms in USD.In the Minimum Amount field, enter the minimum amount that an invoice must have to be eligible for the discount.In the Discount % field, enter the invoice discount as a percentage of the invoice amount.Repeat steps 5 through 7 for each currency that you give the customer a different invoice discount for.
Add or edit lines on price lists using Edit in Excel
The Edit in Excel action lets you use Excel to quickly edit and add lines, and then publish your changes back to Business Central. For example, the action is useful when you want to make many changes. To learn more about the Edit in Excel action, go to Edit in Excel.
Note
If you want to add lines to a price list, you must update the Excel spreadsheet as follows:
Choose the price list you want to update, and then use the Edit in Excel action to open it in Excel.On the new lines for the new price information, fill in the Line No. and Price List Code fields only. Don't add any other information on the line.In the Microsoft Dynamics Office Add-in pane, choose Publish. After the add-in successfully publishes the change, choose Refresh.Fill in the remaining fields on the lines. When you're done, choose Publish again.
set up customer price groups

Sales prices can be made dependent on the customer groups to which you sell. These are called customer price groups.
Before you set up customer price groups, you must decide how many groups you want and which customers will belong to each group.
How to create sales prices for a group of customers
When you have agreed on the prices that the group of customers will pay for certain items, you register the agreement for the individual items on the lines in the Sales Prices page.
To create sales prices for a group of customers
Select Search (Alt+Q)
in the upper-right corner, enter Customer Price Groups, and then choose the related link.
Select the line for the customer price group. If a line does not already exist you can create a new line. Select New to create a new entity and give it a name.
For the selected line, verify the contents of the fields Allow Line Disc., Allow Invoice Disc., Price Includes Tax and Tax Bus. Posting Gr. (Price).
Select the Navigate action, and choose Sales Prices. The Sales Prices page opens. The Sales Type field will be filled in with Customer Price Group.
Fill in the Sales Code with the sales code you selected on the previous page.
Fill in the fields on the lines with the Item No., Unit of Measure Code, and the agreed Unit Price. You can also show the Variant Code column and specify the Variant Code if there are several variants of the item.
If the customer group needs to purchase a minimum quantity in order to gain the price agreed on, fill in the Minimum Quantity field.
If required, enter the Starting Date and Ending Date of the price agreement.
If relevant, you can also specify the Currency Code.
Repeat steps 4 through 8 for each item that you want to create a Sales Price for.
How to enter customer price group codes on customer cards
After you have set up the customer price groups, you can enter the customer price group codes on the customer cards.
To enter customer price group codes on a customer card
Select Search (Alt+Q)
in the upper-right corner, enter Customers, and then choose the related link.
Open the relevant Customer Card for a customer that you want to be part of a customer price group.
On the Invoicing FastTab, in the Customer Price Group field, select the Customer Price Group code.
set up customer discount groups
You can define sales line discounts for a group of customers instead of applying them individually.
Customer Discount Groups are similar to customer price groups, but can be combined with Item Discount Groups to quickly set line discounts to many items for selected customers.
Create sales line discounts for a customer group
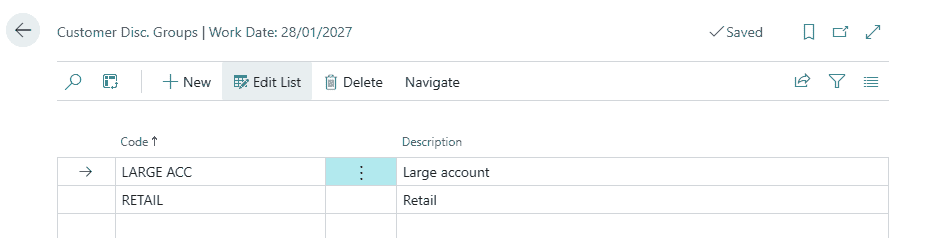
Choose the
icon, enter Customer Disc. Groups, and then choose the related link.On the Customer Disc. Groups page, select New to create a new discount group and give it a name under the Code column and add a description.Choose the Sales Line Discounts action.Fill in the Sales Code column with the discount group created on the previous page.Fill in the fields on the lines with the Type (Item or Item Discount Group), Code, Unit of Measure Code, and the Line Discount %.If the customer group needs to purchase a minimum quantity in order to gain the discount, fill in the Minimum Quantity field.If necessary, enter the Starting Date and Ending Date for the discount group.If relevant, you can also specify the Currency Code or Variant Code after personalizing the columns.
Repeat steps 4 through 8 for each item or item discount group you want to create a sales line discount for.
Assign a customer to a discount group
After you set up the customer discount groups, you can enter the customer discount group codes on the customer cards.
Choose the
icon, enter Customers, and then choose the related link.Open the Customer Card for a customer you want to be part of a customer discount group.On the Invoicing FastTab, in the Customer Disc. Group field, select the group code.
set up salesperson
Many companies want to follow an individual employee's performance as a basis for calculating the sales commission or bonus. See, for example, the Salesperson Commissions report. A company may also want to assign a salesperson to each of their contacts.
When you have set up a salesperson on the Salespeople page, you can select it in the Salesperson Code field on all relevant records, such as G/L account, customer, vendor, contacts, and campaign cards. Then, when you post or set up invoices, credit memos, journal lines, finance charge activities, and so on, the salesperson code is carried to the resulting ledger entries.
To set up a salesperson code
Select Search (Alt+Q)
in the upper-right corner, enter Salespeople, and then choose the related link.On the Salespeople page, choose the New action.
You can use salespeople in various relationship management and marketing work. For example, you can assign tasks to salespeople, so that the tasks are incorporated in sales opportunities that the salesperson are assigned to. For more information, see Set Up Opportunity Sales Cycles and Cycle Stages.
set up documents sending profiles
You can set each customer up with a preferred method of sending sales documents, so that you do not have to select a sending option every time you choose the Post and Send action.
On the Document Sending Profiles page, you set up different sending profiles that you can select from in the Document Sending Profile field on a customer card. You can select the Default check box to specify that the document sending profile is the default profile for all customers, except for customers where the Document Sending Profile field is filled with another sending profile.
When you choose the Post and Send action on a sales document, the Post and Send Confirmation dialog box shows the sending profile used, either the one set up for the customer or the default for all customers. In the dialog box, you can change the sending profile for the sales document. For more information, see Invoice Sales.
To set up a document sending profile
Select Search (Alt+Q)
in the upper-right corner, enter Document Sending Profiles, and then choose the related link.On the Document Sending Profiles page, choose the New action.Fill in the fields as necessary. Hover over a field to read a short description.
To specify a sending profile on a customer card
Select Search (Alt+Q)
in the upper-right corner, enter Customers, and then choose the related link.Open the card of the customer who you want to set up a sending profile for.In the Document Sending Profile field, select a profile that you have set up as described in the previous procedure.
send documents by email
You can easily share information and documents, such as sales and purchase orders and invoices, by email directly from Business Central, without having to open an email app.
You can send almost all types of documents as PDF attachments. You can also set up a report layout that includes information from the document in the email text, and text that makes the email more friendly. For example, a standard greeting. To learn more, go to Managing Report and Document Layouts.
When you send invoices, you can make it easier for customers to make payments through a payment service, such as PayPal, by automatically adding information and a link to the service in the email. To learn more, go to Enable Customer Payments Through Payment Services.
To enable emails from within Business Central, start the Set Up Email assisted setup guide. To learn more, go to Set Up Email.
Note
Business Central supports only outbound email communications. You can't also receive replies from within the app.
To send documents by email
This procedure describes how to attach a posted sales invoice to an email as a PDF file, and with document-specific email text. The steps are the same for other documents.
Select Search (Alt+Q)
in the upper-right corner, enter Posted Sales Invoices, and then choose the related link.
Select the invoice, choose the Print/Send action, and then choose Send by Email.
In the Email field, choose Yes (Prompt for Settings). To learn more, go to Set Up Document Sending Profiles.
If the Email field on the Send Document to page is set to Yes (Prompt for Settings), the Send Email page opens. The page shows the contact person in the To: field and the document attached as a PDF file. In the Body field, you can either enter text manually or you can have the field filled with a document-specific email body that you set up.
Choose the OK button.
In the To: field, enter a valid email address. The default value is the customer email address.
In the Subject field, enter a descriptive subject text. The default value is the customer name and invoice number.
In the Attachment field, the generated invoice is attached by default as a PDF file.
In the Body field, enter a short message to the recipient.
If a document-specific email text is set up on the Report Selection – Sales page, the Body field is filled in automatically. To learn more, go to Set Up Reusable Email Texts and Layouts.
Choose the OK button to send the email message.
Note
If you don't want to specify email settings each time you email a document, you can select the Yes (Use Default Settings) option in the Email field on the Send Document to page. In that case, the Send Email page won't open. See Step 4. To learn more, go to Set Up Document Sending Profiles.
To compose and send an email
You can quickly compose emails for contacts, customers, vendors, salespeople/purchasers, and bank accounts directly from the pages for those entities. Just choose Process, and then Send Email to open the email editor. For bank accounts, the Send Email action is under Actions.
Tip
If you often send email messages that are similar, or want to send a bulk communication, using Word templates with email can speed up the process. For example, to advertise a sales campaign. You can create a template for entities such as customers, vendors, and contacts. Templates can generate the content of an email message for you. Templates can even personalize the content for the recipient based on data in Business Central. To learn more, go to Use Word Templates for Bulk Communication.
Attach a document to an email
There are several ways to attach documents to emails.
If you're assigned to an email scenario related to the entity you're sending the email to, an attachment might be automatically added to your message. The attachment is added because a default attachment is assigned to the email scenario. You can delete the attachment if you don't want to send it with your message. To learn more, go to Assign Email Scenarios to Email Accounts.
To attach a file yourself, in the email editor, use the following actions:
Choose Add file to select a file.Choose Add files from default selection to manually add the default attachment from the email scenario.Choose Add file from source document to choose a file attached to the document you're working with. The files are either attached to the document itself, or one or more of its lines.
Documents marked as printed when they're sent
Some documents in Business Central have a field that specifies how many times the document was printed. The number in that field is also updated if you send the document by email because a PDF file is generated for it. The number is updated even if you don't send the email.
Sent emails and your email outbox
Business Central stores the emails that you send on the Sent Items page. It stores the emails to let you resend them, or forward them to someone else. If you can't find an email in your sent items, look for it on the Email Outbox page.
Note
Depending on the extension that your company uses for email, administrators can access a list of messages that people sent, but not the content of the messages
The Email Outbox page contains the emails that you saved as drafts and emails that failed to send. For example, if the email address was invalid. The Error Message field provides information about what went wrong, but you can also choose the Show Error or Investigate Error actions to troubleshoot the problem in more detail. The details that the Investigate Error action provides are helpful if you must contact support.
If you set up your email to send messages in the background using the job queue, when a message fails to send, Business Central tries to send it again every few minutes up to 10 times. If a retry fails, Business Central records the reason and you can use the Retry Detail action to review it. If you want to cancel the message, use the Cancel Sending action. The Error Message field updates to Sending email cancelled by user, which makes it easy to identify which messages you canceled.
Note
The retry feature works only for messages that are scheduled to send in the background. If you manually send a message and it fails, Business Central won't retry to send it.
set up shipment methods
Shipment methods often depend on the items, the customers, and the vendors. For example, if the customer lives on an island, they can choose to have items always shipped by air or always by sea. Some customers may require next day delivery. Some may want to pick up the order. On the customer and vendor cards, you can specify what sort of delivery is desired.
You set up the description and code for each shipment method on the Shipment Methods page. For example, you can set up the code FOB, and enter Free on Board in the Description field. You can then enter the code in Shipment Method Code fields elsewhere in the system, such as on a customer card. Then when you create new orders, invoices, credit memos, and so on, the system will enter the description represented by the code. You can change it on the document as needed.
To set up a shipment method
Select Search (Alt+Q)
in the upper-right corner, enter Shipment Methods, and then choose the related link.On the Shipment Methods page, choose the New action.On the new line, specify a code and description for the shipment method.
Tip
If you use Incoterms, set up shipment methods to represent the relevant Incoterms rules.
set up shipping agents
You can set up a code for each of your shipping agents and enter information about them.
If you enter an Internet address for the shipping agent, and the agent provides package tracking services on the Internet, you can use the automatic package tracking feature. For more information, see Track Packages.
When you set up shipping agents on your sales orders, you can also specify the services that each shipping agent offers.
For each shipping agent, you can set up an unlimited number of services, and you can specify a shipping time for each service.
When you have assigned a shipping agent service to a sales order line, the shipping time of the service will be included in the order promising calculation, for that line. For more information, see Calculate Order Promising Dates.
To set up a shipping agent
Select Search (Alt+Q)
in the upper-right corner, enter Shipping Agents, and then choose the related link.Fill in the fields as necessary. Hover over a field to read a short description..Choose the Shipping Agent Services action.In the Shipping Agent Services, fill in the fields as necessary.
Note
If you delete the shipping agent on the order line, the shipping agent service code is also deleted. The contents of fields that were based in part on the shipping agent service are recalculated.
define an invoice posting policy for users

Companies often have unique processes for posting sales and purchase invoices and shipments. For example, processes can vary from one person posting everything on a purchase order, to multiple employees. You can restrict users from posting invoices, or require that invoices are posted together with shipments or receipts.
To specify a posting policy
On the User Setup page, in the Sales Invoice Posting Policy and Purch. Invoice Posting Policy fields, choose one of the following options:
Allowed (Default) – Keep the current behavior, where a user can choose the posting option to use, such as Ship, Invoice, and Ship and Invoice.Prohibited – Prevent the user from posting invoices. Business Central shows a confirmation dialog that provides only the Ship or Receive options.Mandatory – Allow the user to post invoices together with receipts or shipments. Business Central shows a confirmation dialog with the Ship and Invoice or Receive and Invoice options.
Effect on documents
The following table describes how invoice posting policies affect documents.
Note
When you post sales and purchase invoices and credit memos, you don't have any posting options. The documents always post the physical and financial transactions together. You can't partially post invoices and credit memos.
| Document | Option 1: Allow Displays a series of options |
Option 2: Prohibited Confirmation dialog |
Option 3: Mandatory Confirmation dialog |
|---|---|---|---|
| Sales order | – Ship – Invoice – Ship and Invoice |
Do you want to post the shipment? | Do you want to post the shipment and invoice? |
| Sales invoice | No options | Posting is prohibited per User Setup | Do you want to post the invoice? |
| Sales credit memo | No options | Posting is prohibited per User Setup | Do you want to post the credit memo? |
| Sales return order | – Receive – Invoice – Receive and Invoice |
Do you want to post the receipt? | Do you want to post the receipt and invoice? |
| Inventory pick | – Ship – Ship and Invoice |
Do you want to post the shipment? | Do you want to post the shipment and invoice? |
| Purchase order | – Receive – Invoice – Receive and Invoice |
Do you want to post the receipt? | Do you want to post the receipt and invoice? |
| Purchase invoice | No options | Posting is prohibited per User Setup | Do you want to post the invoice? |
| Purchase credit memo | No options | Posting is prohibited per User Setup | Do you want to post the credit memo? |
| Purchase Return Order | – Ship – Invoice – Ship and Invoice |
Do you want to post the shipment? | Do you want to post the shipment and invoice? |
| Inventory Put-away | – Receive – Receive and Invoice |
Do you want to post the receipt? | Do you want to post the receipt and invoice? |
| Warehouse Shipment | – Ship – Ship and Invoice |
Do you want to post the shipment? | Do you want to post the shipment and invoice? |
Note
The setting doesn't affect posting of general journal lines where you can select Invoice in the Document Type field.
update documents dates with posting dates

The Document Date and Posting Date fields on sales and purchase documents helps you comply with accounting standards and get accurate financial calculations. The fields serve different purposes:
For Business Central to correctly calculate finance charges and the amount due on sales invoices, the Document Date must align with one of the following dates:
The date on the sales invoice that you sent to the customer.The date on the purchase invoice that you received from your vendor.
The Posting Date shows when a document was registered in Business Central. Many accounting standards and regulations require businesses to record and report financial transactions based on the date they occurred.
Depending on your business processes, these dates might or might not be the same. If they're the same, you can set up Business Central to update the document date on sales and purchase documents with the date you posted them.
To automatically set document dates to posting dates, on the Sales & Receivables Setup and Purchases & Payables Setup pages, turn on the Link Doc. Date to Posting Date toggle.
Note
The setting doesn't affect sales or purchase journals.
display a stockout warning

When someone enters a quantity for an item on a sales document that exceeds the item's current inventory level at the location, you might want to let them know by displaying a notification. The notification is just to inform them of the potential problem, and doesn't prevent them from creating the order.
To show a warning about low inventory on a sales document
Select Search (Alt+Q)
in the upper-right corner, enter Sales & Receivables Setup, and then choose the related link.Depending on whether you want to show the warning, turn on or turn off the Stockout Warning toggle.
Video guidance
The following video shows a scenario where someone is creating a sales order, and the quantity exceeds the available inventory level for the item at its location.
Sales Setup Guide for Business Central
This guide outlines key steps to configure sales processes in Dynamics 365 Business Central, including:
General Setup: Define sales policies, document requirements, and posting rules on the Sales & Receivables page during initial implementation.Customer Management: Register customers via Customer Cards, apply templates for efficiency, and set credit limits or payment terms.Pricing & Discounts:
Configure price lists, line discounts, and invoice discounts based on customer groups, quantities, or dates.Use the New Sales Pricing Experience (if enabled) for streamlined price management. Payment Services: Enable PayPal or other payment methods for customer invoices.Shipping & Logistics: Set up shipment methods (e.g., FOB) and shipping agents with tracking services.Document Handling:
Assign salespeople and set document-sending profiles for automated email workflows.Use Posting Policies to control invoice posting (e.g., mandatory shipment + invoice). Notifications: Enable stock-out warnings for low inventory during sales order entry.
Additional features include VAT verification, bulk price updates via Excel, and best-price calculations. For detailed steps, refer to linked sections like Record Special Prices or Set Up Finance.
Summary: Comprehensive setup ensures accurate sales transactions, efficient customer interactions, and compliance with financial standards.
© 版权声明
文章版权归作者所有,未经允许请勿转载。
相关文章


暂无评论...